Showing posts with label Sinful Colors. Show all posts
4 comments

25th Birthday Mani

So it has been a crazy long time since we have posted, but life has been beyond crazy.  This tax season is completely kicking my ass, therefore causing me to be more lazy then general once I get home.  However, I did have a birthday since the last post.  I'm now officially a quarter of a century out...yay!

So here is my birthday mani. It was completely copied from Deniz.  Click here to see the original.  She is amazing! I used OPI Pink Friday, Sinful Colors Pink Creme, Essie Main Squeeze, OPI Alpine Snow and a pink nail art polish.  Hope you like it!

~Nailed by Brittany~e

2 comments

Christmas Trees

So I'm just going to do a quick post for you today.  Sorry for the lack of post yesterday, but I was traveling most of the day and didn't have time to get a post together.

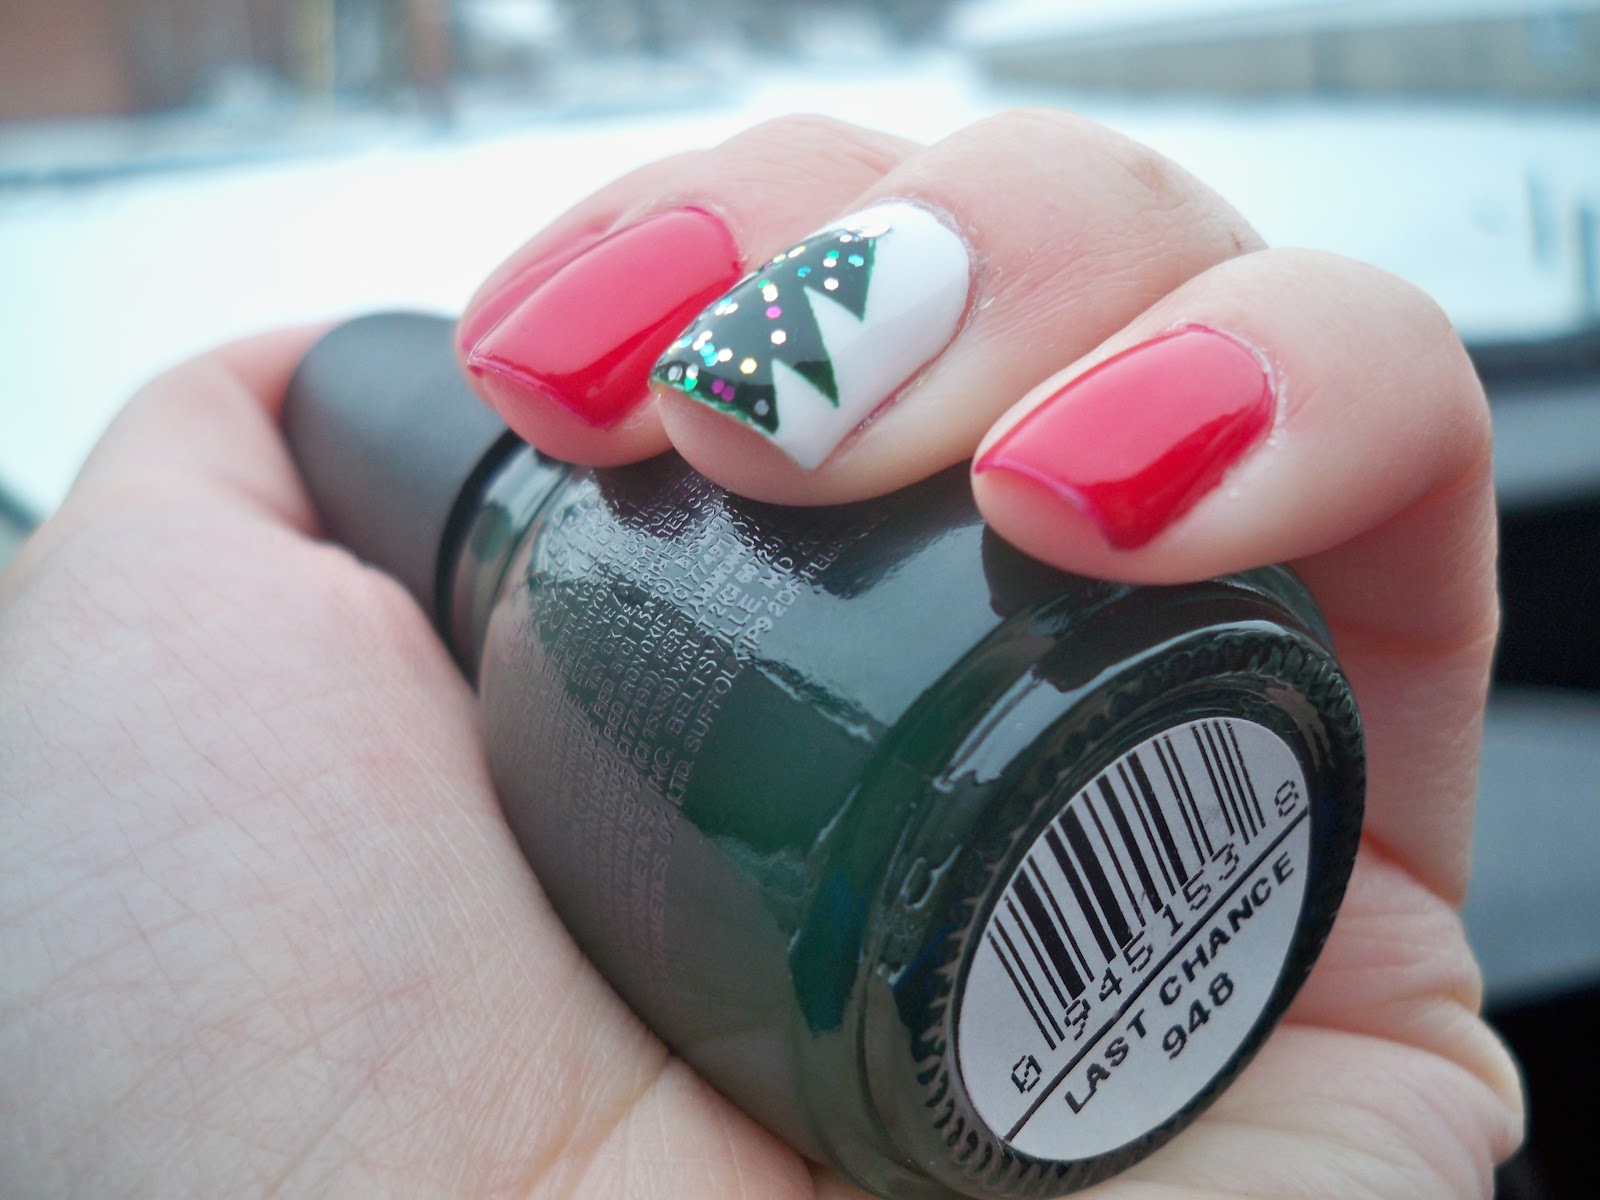
I wanted to share with you the Christmas tree manis that I did this week.  I had seen the tutorials from the amazing Jane at Nailside and just have to give them a try.  The first mani started with 2 coats of Sinful Colors Ruby Ruby on all my fingers with a nice coat of SV to finish it off.  However, on my ring finger I did 2 coats of OPI Alpine Snow and then topped that with a coat of SV and then taped off the Christmas tree and I used Sinful Colors Last Chance.  I then added an unknown multi-colored glitter to look like  ornaments/lights and one large sliver glitter as the topper.  I really liked the way this came out.  I definitely need to practice my taping skills, but I still think that they looked good.
That's snow is the background :)

This photo shows Ruby Ruby the most accurately.
The next Christmas tree mani that I did is a little more crazy. I started by creating a jelly sandwich with China Glaze Innocence and an unknown red and green glitter on all my fingers except for the ring finger.  On the accent nail I started with 2 coats of Finger Paints Scenery Greenery and added a layer of unknown green/silver glitter polish.  After topping that with a coat of Gelous and SV I taped off the tree and used OPI Wocka Wocka!  I also added a little bead (I received these with my December Julep Maven box) as the topper.  One last coat of SV sealed it all in. Its a little crazy but I still love it :)
Sorry about the lighting.  I'm at my grandparents and I didn't get a picture in the sunshine (I was napping :) )

I hope everyone is enjoy this holiday season!!!

Merry Christmas!!!

~Nailed by Brittany~

P.S. As you can see I was unable to tag my photos. Sorry!
No comment yet

Christmas Sparkles

Today I'm bringing you a holiday inspired mani. With my classroom and apartment both decorated for Christmas, I'm feeling jolly. I wanted red with sparkles :)
I decided to go with OPI - Red Hot Ayers Rock. I topped it with Sinful Colors - Pearl Harbor. As usual, the OPI went on great. It was opaque in one coat and dried evenly. After using a coat of SV, I added the sparkles for something a little extra.


What is your holiday mani?
~ Nailed by Ericka ~
1 comment

Peach's Double Lightning Bolt

So after seeing all of the amazing nail art designs at Nailside I had to try one of the designs.  I chose to attempt the double lightning bolt.  I replicated the "Cute double lightning bolt".  I really loved the colors of these nails and decided that I would try to match them with my nail polishes.  I titled this post Peach's Double Lightning Bolt, because these colors remind me of Peach from Super Mario, and I think that if she had painted nails they would be done like these :)

Jen picked me up a set of the OPI Nice Stems sample polishes last Friday from her big haul, so I decided to test them out. I stated with 2 coats of OPI Play the Peonies.  This was my first time using these tiny bottles and I completely love them.  I love small, tiny products :)  I think that it may be because I'm only 5ft tall, so I believe that small things are cute. Next, I cut what seemed to be millions of pieces of tape, but in reality it was only 20 triangle and 20 strips of tape.  You need 2 triangles and 2 strips per nail.  I tried to make all the triangles similar, but I definitely didn't :)

Once the base coat dried I taped off the first bolt design and painted it using Petites Sand Dune.  This is a lovely coppery-gold color.  This polish dried super quick, which was perfect for this manicure. The second bolt color is OPI Come to Poppy.  I topped the whole thing with a coat of SV.
OPI Play the Peonies, Petities Sand Dune, & OPI Come to Poppy

Left Hand

Right Hand
So I totally love my nails!  I know that they aren't perfect and that some of the bolts are a little messed up but from a distance you can't really tell.  I think I did pretty good for it being my first attempt.  I will definitely be trying this design in the future with different color combinations.  What do you think?

Also I wanted to show you how I dressed up my nails from Tuesday.  I really loved the color from Fly Away, so I decided to add a layer of OPI Black Shatter.  I have had this polish for quite awhile and have only really used it once before, so I figured it was about time.  I also added a top coat of SV.  I was a little nervous at first about adding the shiny top coat over the matte top coat, but it turned out just fine.  I really liked the effect of the Nubar 2010 peaking out from under the crackle.
OPI Black Shatter, Sinful Colors Fly Away, Nubar 2010, Sech Vite
~Nailed by Brittany~
No comment yet

Fly Away Blue

So for today's manicure I wanted to play with the matte top coat again.  The way that I came up with this one was by accident.  When I get ready to paint my nails I generally test out all the colors on a piece of paper.  I know that the colors are not going to be completely color accurate, but I still like to see the color combinations before painting my nails.  So last weekend when I was trying to come up with the nail design for my mom's nails, I tested out my new polish from Sinful Colors-Fly Away.  It looked beautiful on the paper, so I added a little bit of Nubar- 2010 and the effect that it had was just too good to pass up.

I started with 2 coats of Fly Away.  The formula was good and it would have been fine with one coat, but I did 2 for good measure.  I took photos of the color alone, but due to the lack of a/c in the apartment and my inability to clean up my nails well, I'm too embarrassed to even post them.  Next, I added one coat of Nubar 2010 (I truly love this polish....LOVE!).  To really bring out the flaky goodness I added a coat of Hard Candy Matte-ly In Love.
This photo shows the color of Fly Away the best.  This was taken inside with the flash.

The rainbow flakes are just so pretty.  I had a hard time not staring at my nails all day.
So here is a little funny story.  So did my nails last night, but didn't realize until I got to work this morning that I hadn't added the matte top coat to my middle finger on my right hand.  I just couldn't believe that I had completely missed a nail.  Thankfully I spend most of my day sitting in my office...alone, so there wasn't even anyone to notice.

~Nailed by Brittany~
No comment yet

Feeling a Litte Blue & Guest Nails

So, last week I decided that I wanted to test out Finger Paint- Artistic Azure.  I have used this polish a couple of times to stamp with, but I had never actually worn it alone.  I'm so happy that I did.  I applied 2 coats, and topped it off with a top coat of SV.  The color of the polish is amazing.  Its a deep, rich, but still bright blue.  Depending on the light the color would read differently.  Below are inside pictures without a flash.

I also wanted to show you the nails that I did for my mom and her friend last weekend.  They had their 30th high school reunion and wanted to have their nails done.  My mom loves the stamping so I stamped both ladies' nails.  Here are the results:
Used Ulta Salon Formula Encore Pink as the base (2 Coats) & Concrete Evidence for the stamped imagine
Used Sinful Colors Love Nails as the base (3 coats- this is a very sheer polish) & Finger Paints Artistic Azure for  the all over stamp imagine.  We also added silver flowers to each nail using Wet n Wild Silvivor.
~Nailed by Brittany~
3 comments

Sinful Shatter

While trying to fight the heat this week, Jen and I decided to paint our nails in the great outdoors. Seeing as how we are not the typical campers (instead of cooking over a fire we prefer to get fast food, watch dvd's, and have a fear of wildlife), nail painting seemed to fit right in with our night. I decided that I wanted to use Shatter since it's been quite some time since I've used it and I wanted to put bright colors underneath since I was in a summer-y mood. However, while trying to paint my nails, a raccoon decided to join our "party" and resulted in very rushed and disastrous results.

I attempted to give this design another try now that I am at home in the air conditioning. To start off, I painted each nail with a white base coat to help the colors pop. Next, I painted horizontal stripes of Sinful Colors Timbleberry, Dream On, Irish Green, and Fly Away. I topped it off with OPI Black Shatter and a layer of SV Top Coat.
Sinful Colors: Timbleberry, Dream On, Irish Green, and Fly Away


~ Nailed by Ericka ~

So I liked Ericka's nails so much when she did them earlier this week that I decided to try it on my own. I'm definitely more partial to brighter colors and I love the way that mine turned out. I used China Glaze Pink Voltage (neon), Celtic Sun (neon), Sexy in the City, and Ultra Pro Lime Light on a white base and then used OPI Black Shatter on the top.
~Nailed by Jen~